Managing a 2500+ Switch Collection
Yeah, yeah – believe it or not I didn’t actually forget to write a full switch review last week. While the choppy publishing schedule over the past month or two as a result of traveling and work may lead you to believe otherwise, it does still feel a bit weird to me when I’m not writing a switch review or working on documenting switches in some way on any given Friday night. Don’t worry though, last week’s absence was, in my opinion, more than justified as I was working on adding a backlog of over 200 modern, MX-style switches to my collection. After having waited several months to get testers number seven and eight cut for my collection display, I simply couldn’t wait any longer without running the risk of my body being found in my apartment drowned in a mountain of switches. Realizing that having to spend an entire weekend to move around furniture, clear out your calendar, and stay up late into the night to try and reorganize a collection of anything isn’t exactly common for most people, I figure it would be worth giving you all a peek into my collection management process, and perhaps give some insight as to just why it takes me so long to add stuff to the collection. Before we get into all of that, though, let’s take a broad step back and look at how it is organized at the absolute highest level.
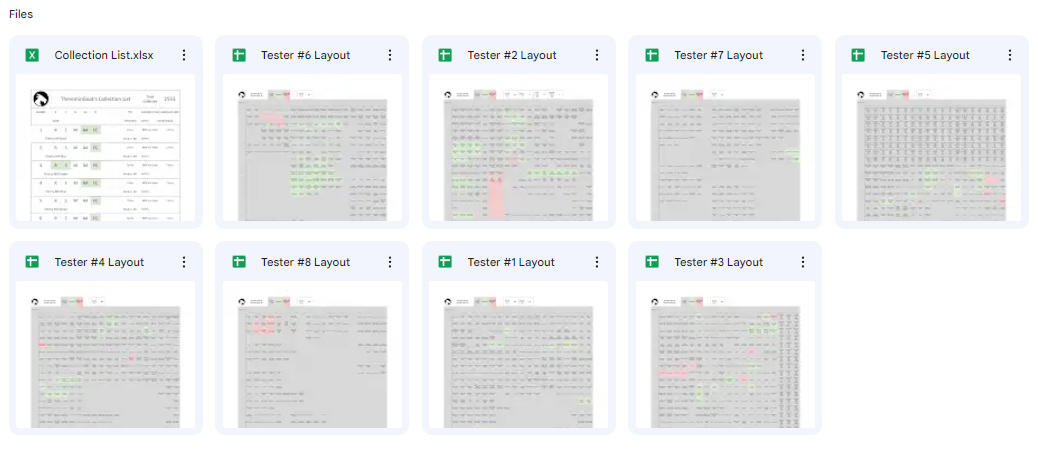
Figure 1: Years and years of chaotic hoarding in a handful of Excel sheets.

Figure 2: How the switch collection looks most days, tucked away in their unbranded pizza box stacks.
The official number of switches that I share whenever anyone asks me how many switches that I have is based on the official, publicly accessible collection documents that I have stored in my Google Drive folders shown above in Figure 1. While some collectors officially add to their total whenever they place an order for switches or whenever that package they ordered hits their doorstep, I do not officially count switches as ‘in my collection’ until they are on that list. This is partly because I can hardly keep track of all of the packages I have moving around the world on any given day and partly because of fear of shipping issues arising should I start counting my switch chickens before they hatch. Naturally, this can create a bit of a lag between when I first order switches that I know I need and when they officially can be checked off of my to do list. (You’ll see how this plays into my weekend delay in a few paragraphs.) While these Excel sheets contain all of the types of switches that I’ve collected, the collection boxes and display testers shown above in Figure 2 are the testers which I mainly display my modern, MX style switch collection as well as some Alps and Hi-Tek 725/Space Invader switches. The occasional ultra-low profile switch, new Razer optical, or strange vintage computing contraption of a switch which I get to add to my collection are all stored in a separate, smaller box. As for the physical testers themselves…

Figure 3: Here's what just six of them looked like at the Cannonkeys meetup from earlier this year.
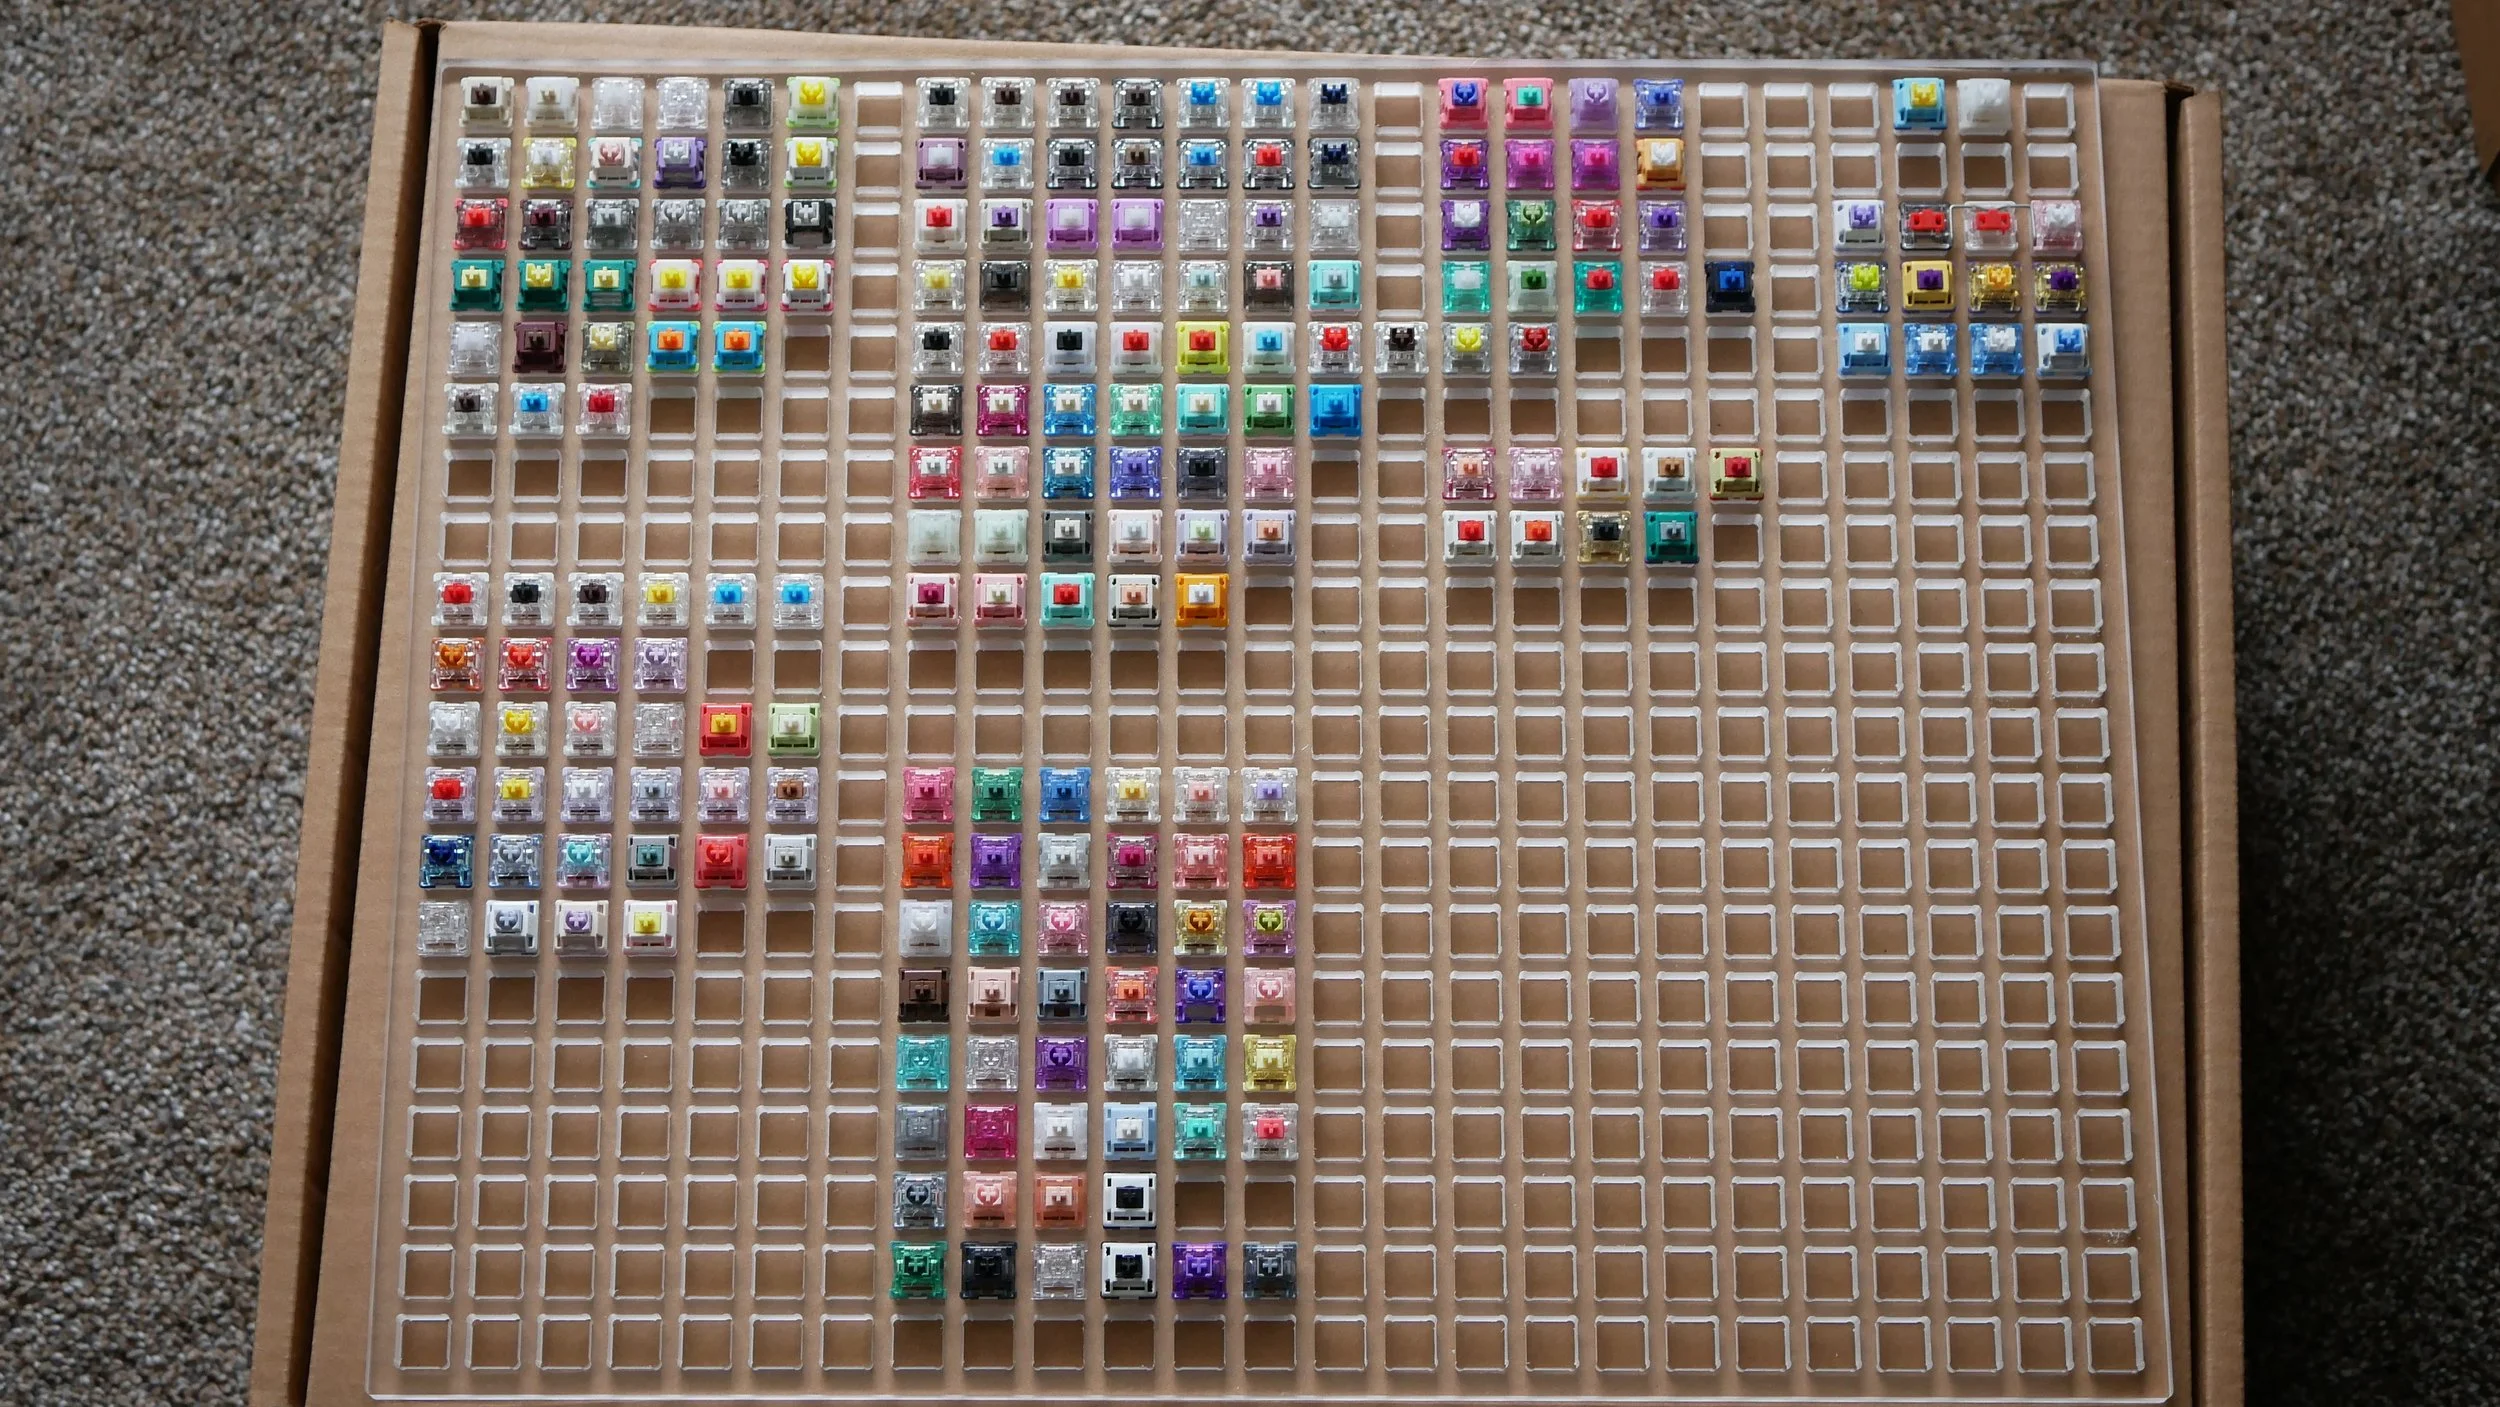
Figure 4: A more top down example of what a freshly reorganized switch tester might look like.
As of last week, I now officially have eight different, 500 slot switch displays (or ‘testers’) which I use for organizing and displaying my collection at meetups. These 500 slot testers were first designed by one of my longest keyboard hobby friends and noted keyboard designer James of Alchemist Keyboards and have been custom cut by nearly a half dozen different people throughout the years as the collection has grown. While the first two testers which I ever had made had both MX and non-MX style switch cutouts (namely Alps and Hi-Tek 725s), the last six have all been strictly MX style slots since this is the vast majority of what has been released in the past few years and what I largely collect. As you may have been able to put together by the display of the Google Drive folder where I keep track of my collection, each tester has its own sheet which is squared off and filled in as a sort of key as to which switch is switch. The tester shown above in Figure 4, for example, is Tester #7. Each of my testers is loosely organized by groupings of brands and has sort of grown organically over the years of collecting and as more manufacturers have come into the hobby space. Originally, tester #1 could contain everything on its own, with Cherry, Gateron, Kailh, Alps, and everything else under the sun. As time has moved on, though, Tester #1 has grown to really only be able to accommodate OEM-style releases from the largest manufacturing brands, Gateron, Alps, and vintage MX-style switches. The following is a breakdown of where brands and groupings of different types of switches are stored on my various testers:
Tester 1 – Big Manufacturer OEM, Cherry, Gateron, Alps, Vintage MX-style
Tester 2 – Outemu, Unknown Manufacturers
Tester 3 – Durock/JWK
Tester 4 – Kailh, KTT, Huano, and LCET
Tester 5 – Tecsee, TTC
Tester 6 – SP Star, Aflion, Haimu, Keychron
Tester 7 – SOAI, BSUN, Grain Gold, DareU, Meirun, Jerrzi, Akko
Tester 8 – Razer, LICHICX, Greetech, Momoka, Other Unknown Manufacturers
As alluded to in the previous paragraph, as testers begin to fill up and I continue to take in more switches, I eventually run out of room and are forced to order more testers to help reorganize and space stuff out. As soon I do place an order for new testers, I set the arriving packages of switches into a ‘stopped state’ where switches begin to pile up in my incoming mail pile indefinitely until I get my new testers and a place to house them. While I’m normally pretty good about doing this well in advance of a serious backlog forming, the combination of work stress over the past few weeks and delays from the individual cutting my testers for me this time caused that mail pile to balloon… a lot. In fact, the 200 different switches that I received came from well over a dozen different sources including my own sponsors, random orders from TaoBao/AliExpress, and even gifts from other vendors that I wasn’t even aware that they had sent me. (Certainly this isn’t that good of a look on my behalf.) Once my new testers do arrive, though, I begin the slow and painful process of reorganization and then adding this backlog of new switches to my collection. Truthfully, there’s no good way to go about doing this.
After having reorganized and grown the collection from one tester to now eight over the span of just a small handful of years, my process for expansion and adding of new switches en masse has sort of developed into a two-step process. The first step focuses on just reorganizing existing switches in my collection and moving sets of brands/manufacturers to different testers in order to maximize the amount of space that they have to grow. Often times this results in me having to make guesses as to which brands are going to be increasing production in the coming years so that I can give them more space for future switches, such as BSUN or Haimu in this latest expansion. As for how this process is physically done, that too is not all that easy. What often happens is that I spread out all of my testers on the floor of my living room and/or bedroom, sit down with my laptop and my organizational sheets for each tester open, and move blocks of switches around one by one both on the physical testers and in the sheets themselves. Naturally, this is an iterative process that could see me moving the same lot of switches around a handful of times depending on where I think things will fit best. In a way, this is almost like a ‘reverse puzzle’ as I’ve got to try and space switches out enough that they can continue to grow spots on their testers without overcrowding other testers or running out of space on them. This last weekend, just this first step was my entire Friday night and about half of my Saturday as well.
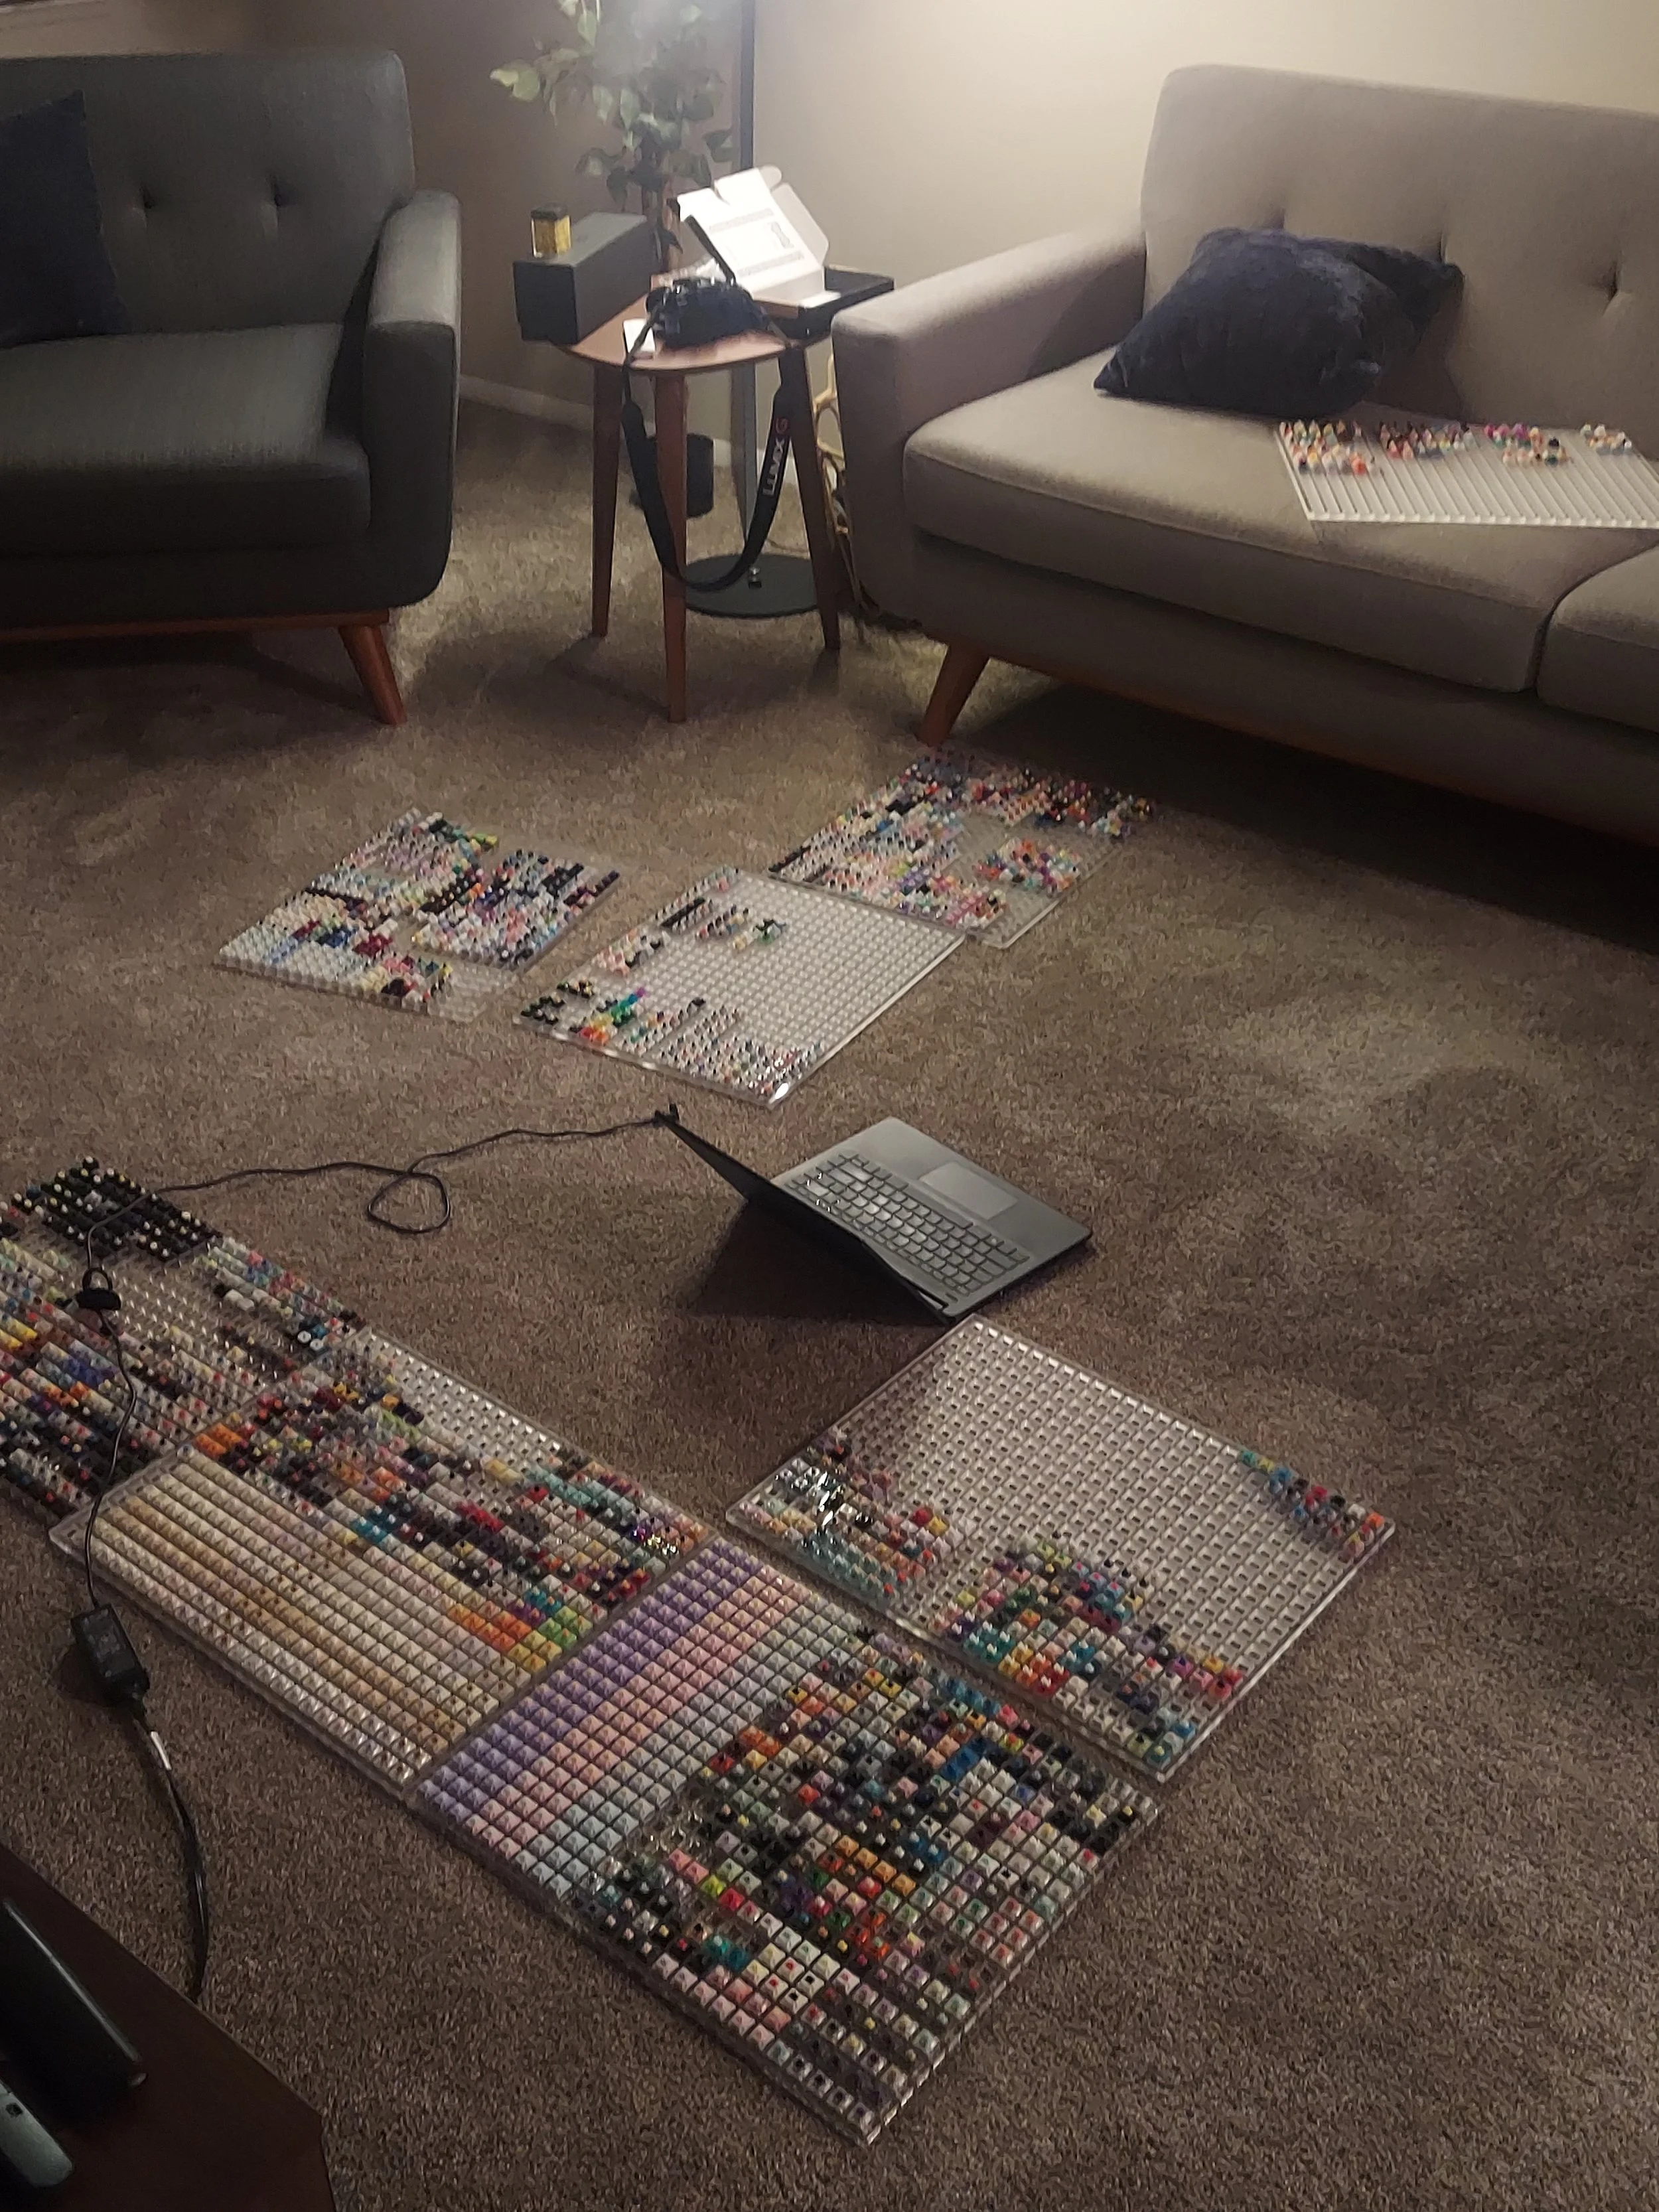
Figure 5: Reorganization night setup by "candlelight". It's honestly becoming almost impossible to get the whole collection in one coherent photo.

Figure 6: Large batching of switches being added to the collection list during the formal addition stage before making it to the testers.
The second step of expanding and adding to my collection in a bulk fashion is what I mentally refer to as the ‘formal’ addition stage. This formal addition process is where I add switches to the giant, continuous ‘Collection List’ Excel sheet where all of my switches get added regardless of their type or whether they are going onto a display tester or not. After adding batches of switches to this complete sheet, I then move them to the floor or wherever I’ve got all of my testers splayed out and begin adding them there. Rinse and repeat this process over a couple dozen times and you’ve got yourself half of a Saturday and a not insignificant part of a Sunday there too for this second step. Once this is up to date for any given backlog, I can begin again slowly adding to the collection gradually instead of having to take an entire weekend off in order to catch up. In case you get a chance to visit the ‘Collection List’ Excel sheet as well, I figure I should probably explain how organization on that sheet works as well since I get asked about it frequently. Each switch gets a two line entry of cells which looks like the following:

Figure 7: Example of what a single switch entry looks like on the 'Collection List' Excel sheet.
I’m sure you can immediately recognize some of the more obvious features on these cells, including the number that the switch is, its name, and what its type is (linear, tactile, clicky, etc.). Some of the more ambiguous features which people ask about include the two cells on the upper right hand side of each line as well as what R, S, M, AA, and FC stand for. The two cells on the upper right correspond to the location/person/vendor I got the switch from on the left and who the manufacturer is on the right. Since I implemented this feature after I already had several hundred switches in my collection, I unfortunately can’t say for certain where all of my switches have come from, but I feel pretty confident about the vast majority of entries there. (Sometimes it’s deliberately left blank since I’m not supposed to reveal how I have certain secret switches!) As for the letters which look like starting guesses for the Wheel of Fortune bonus round, these refer to Review, Scorecard, Measurements, Artisan Addendum Measurements, and Force Curves, respectively. While hardly a perfect system, these are a way for me to keep track of which switches I’ve done documentation on and what still needs done for any given switch. As can be seen above for the Gateron Oil King switches, I’ve done everything I have content wise for them with the exception of measuring their keycap stem mounting points for my Artisan Addendum measurement sheet. Now while that more or less covers how I dig myself out of an adding to the collection backlog, I still haven’t quite figured out how to best dig myself out of a measurement and force curve backlog yet…
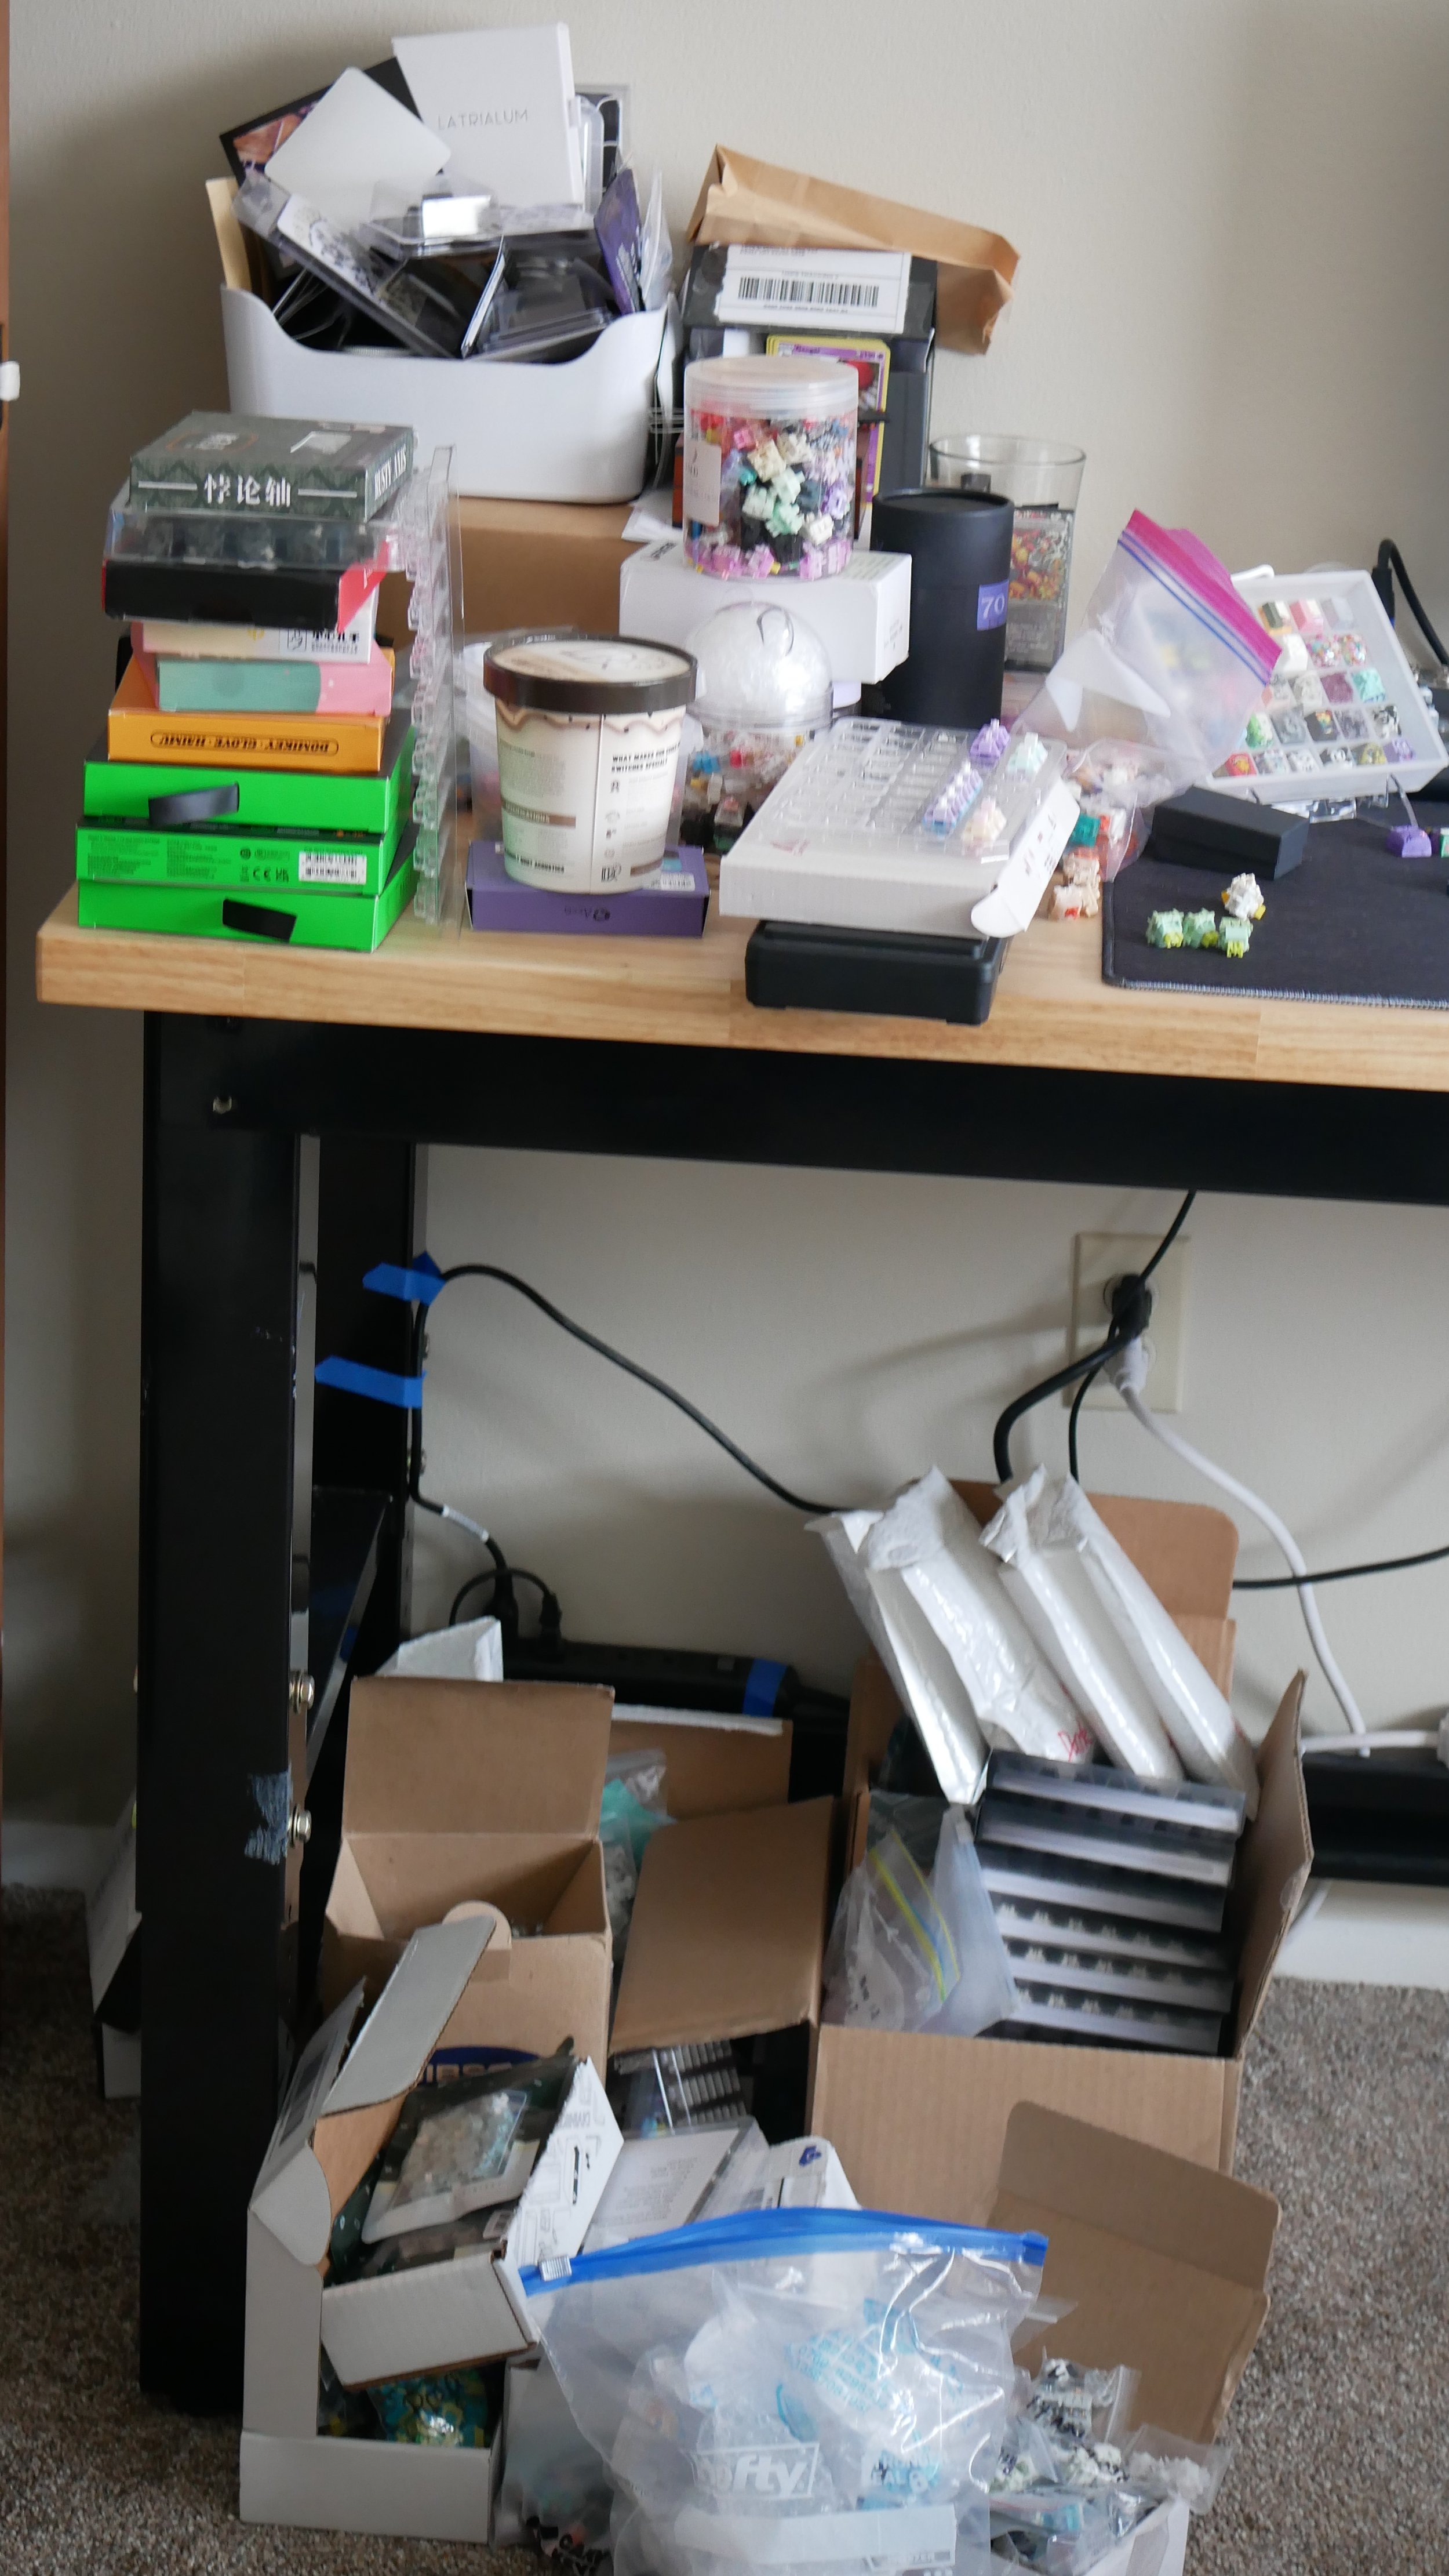
Figure 8: I knew I bought a big desk for a reason...